How to Test a Broken Ethernet Cable at Home

If all methods of determining the cause of the breakage have failed, the cable has likely suffered a break or short circuit. It is not necessary to inspect the entire length of the cable to find the problem area. However, if it is not large, it can be done. In case the twisted-pair cable is not broken completely, it is impossible to find the place of the break inside with your eyes. In this article, I will describe how to test ethernet cable.
Devices for detecting breaks and shorts come to the rescue. These include professional testers, simple multimeters, and ways to test with salted water or potatoes.
The Tester is a Great Way to Test
The best way to find out if a cable is broken is with a tester. Before you start checking, you should inspect the entire length of the cable and especially pay attention to the crimping quality of the plug. If the crimp is poor, some wires will have contact problems. Conductors may also be overlapped in a fixed position. That way, they won’t short out. If the breakage cannot be detected at first glance, you can use a tester, which will provide a quality check.

Important! Thanks to the displays, modern testers have great functionality and are easy to use. They allow you to test the cable and accurately determine the break and short circuit location.
The tester is one of the most popular tools on the market, as it has many features, among which:
- determining the degree of correctness of the wiring;
- determination of the location of the breakage;
- determination of the type of breakage;
- determining the distance to the breakage;
- tracing the wire.

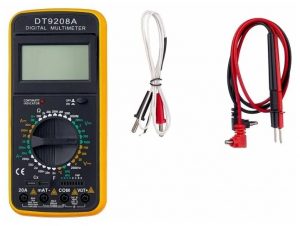
Such a device is good, but if you have a multimeter or an ordinary arrow tester handy. They will help you measure the resistance in the circuit, the voltage, and the type of current. A multimeter may be enough to analyze a twisted pair. To begin the analysis, you need to turn on resistance mode and bring the cable ends together. If this is successful, then further testing is done in the following order:
- checking the continuity of all conductors of the cable individually;
- test each cable by color;
- сheck for short circuits with adjacent conductors;
You can buy Network Tester on Amazon.
It often happens that it is impossible to put the ends together. Then the connector is either cut, or the conductors on one end are stripped and connected. Then the pairs at the other end are probed with a multimeter.
Step-by-step Instructions on How to Test E Cable Using a LAN Tester
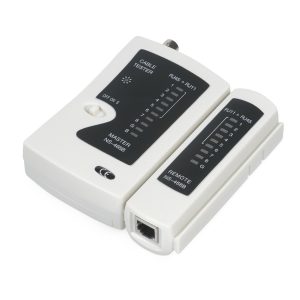
- Purchase an Ethernet cable tester. Choose from a variety of models. Please make sure a battery is inserted in the tester, and then turn it on.
- Plug one end of the cable into the outgoing connector. In most cases, this connector is labeled “TX.”
- Connect the other end of the cable to the incoming signal jack. In most cases, this connector is labeled “RX.” Some models of testers have a removable receiver that can be used to test the cable in different rooms.
- Look at the indicators on the tester. On most models, you will find 2 rows of 8 indicators corresponding to the 8 pins on each end of the Ethernet cable. You will also see a “G” (ground) indicator. The tester will check the continuity of each pin on the cable. If all 16 LEDs light up, the cable is good. If any indicator does not light up, there is a break in the line. Do not worry if the “G” indicator does not light. You have a crossover cable if the indicators do not light in order. Once again, if all the indicators are lit, the cable is working fine.
Checking with a Digital Multimeter
Checking with a digital multimeter is almost the easiest way to test a cable. The green and orange pairs of wires are taken for the test. The procedure is as follows:
- Switch the device to search for resistance;
- Touch the orange strands with the stylus;
- The resistance should set at a few ohms;
- Touch the green cores and carry out the same test;
- Touch the orange and green strands and get a resistance value of 100 ohms or more.

If the measurement was successful and showed the same figures, the wires are in excellent condition. If the pairs do not test, it is necessary to replace them with unused ones, e.g., brown or blue.
Checking in the Absence of Testers
A multimeter and tester may not be available. In this case, you can use the manual test technique. To do this, cut off pieces of cable up to 15 cm long from each end. Then you should remove the winding by 5 cm. And bare the conductors by a couple of cms.
After that, prepare a container with water, which should be glass or plastic. Common table salt of 1/4 weight of water is added to the liquid and stirred until completely dissolved. The cable strands are conductors, and their contact should be avoided.
The other side of the cable should be connected to aт ordinary battery.
Once powered, you should watch the wires in the water. The minus conductor should be covered in white bubbles, and the plus conductor should be yellowish-green. If this is the case, the twisted pair is in good condition, and no short circuit has occurred. If there were a short circuit, bubbles would also come from the other strand.
Potatoes and Twisted Pairs
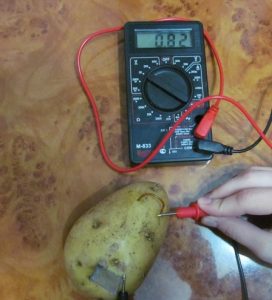
This method requires potatoes and a prepared twisted pair. The procedure is as follows:
- The potato is cut in half;
- The cables, one by one, are shoved into it one centimeter at a time;
- The distance between the wires is a few millimeters;
- Next, you need to watch the reaction. If near the wire with the positive sign turned green, and with the negative – went white foam, then all is well with the cable;

You can also use an apple instead of a potato for this method. All experiments have shown its effectiveness, but it is not seen as clearly with an apple.
There are no questions about how to diagnose Internet cable failure with special programs and devices, testers, or multimeters. Without additional online instructions, anyone can check the Internet cable for functionality in a sudden data signal loss.
