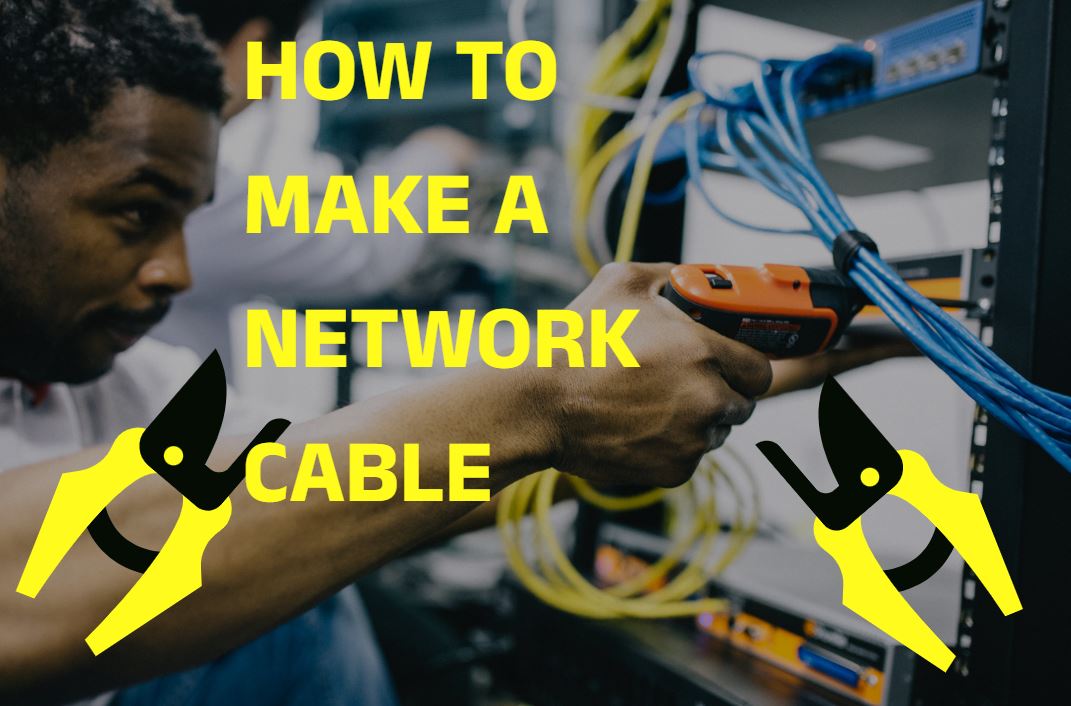
How To Make a Cat6 Patch Ethernet Cable
Is it difficult to make a Cat 6 ethernet cable yourself and run it at home? The answer to this question is in this article. Also, in this article, I will give you tips for wiring the Cat 6/6a cable.
Connecting home electronics usually boils down to one thing: plugin and go. Computer technology has become smart enough not to require the user to have physical and mathematical knowledge. Once complex, requiring particular training actions have ceased to scare the modern home user: no matter, reinstall the operating system on the working machine or configure the router for home use.
Along with electronics wised up and the user – now you can open a site, read the instructions and repeat everything in practice. For example, amateurs indulge in setting up home servers, file storage, or video surveillance, where twisted pairs connect the devices. And so in such entertainment often have to crimp the wires.
Although there are ready-made solutions on the market, they are all led to the standard and are unlikely to be useful for the individual tasks of a particular user, so any home enthusiast has to do twisted pairs by hand. Especially for this, there is everything you need: tools, connectors, and wires. It only remains to find the instructions and boldly proceed with the experiments.
What will You Need for Wiring Ethernet Cable?
Professionals recommend using the following tools to crimp a twisted pair:
-
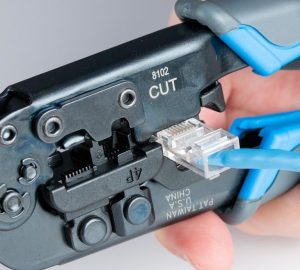
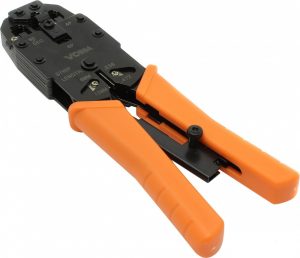
Crimper. These are special pliers used for crimping RJ-45 and/or RJ-11 connectors. The crimping process is quite simple: the prepared end of the twisted pair is inserted into the connector, which is placed in the appropriate slot of the pliers, then the handles of the tool are squeezed, resulting in crimping until the characteristic click is made.
When choosing a crimper, you should pay attention to the following points:
– The tool must be massive enough. Lightweight pliers are usually not strong enough and will fail quickly. On the other hand, a heavy tool will cause rapid fatigue.
– The halves of the pincer press should not be bent (misaligned) relative to one another. The slightest misalignment will cause the connector to break during crimping.
– Ergonomics, the tool must be comfortable.
-
Stripper. It is a versatile tool for cutting twisted-pair cables (cutting, stripping, etc.). Indeed, the cable end can be shaped with a straightening knife, but the stripper is more convenient for this purpose.
The advantage of this tool is that when removing the outer insulation, the wire coating is not damaged. Please note that the stripper is not allowed to cut FTP cable (which has a foil shield, i.e., shielded).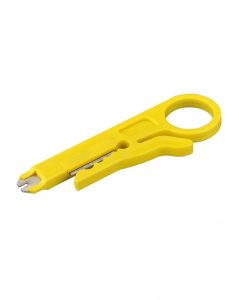
-
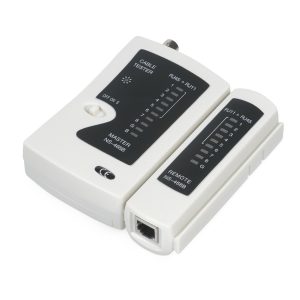
Tester for twisted pair. With this device, you can detect both a problem with the cable (breakage, short circuit) and improper crimping. There are devices with extended functionality. They allow you to measure the speed in the LAN segment, the rate of attenuation, etc.
As a rule, simple models with minimal functions consist of two blocks: main and remote adopted the designation of master and remote, respectively. Each unit has LEDs numbered from 1 to 8 and a ground wire G.
Straight and cross crimping
Now let’s move on to the crimping options. They come in two varieties:
- Straight, that is, both ends of the twisted pair are crimped to the same standard.
- Cross, in this case, one end is crimped to standard T568A, the second – T568B.
Crimping order
Now let’s go directly to the proper way to crimp a cable. Be careful in your work – the main thing is not to damage yourself, and the connectors are cheap.
Recommendations for Category 6/6a Ethernet Cable Wiring
These Category 6a Crimping Guidelines are applicable to Category 6a cable or any other cable up to 1.08mm± 0.02mm OD.
-
Remove outer insulation
– Make a circular cut at a distance of about 10 cm from the cable end
– Bend the cable at the place of the cut until the cut sheath segment is separated from the jacket
– Remove 10 cm of the outer sheath from the cable. -
Remove the pair separate crimping cat6or from the part of the cable that will go into the connector
– Make a 1 cm deep longitudinal cut on the outer cable sheath
– Lead the plastic divider into the cut made in the sheath and cut it off. -
Preparing pairs of the cable for installation
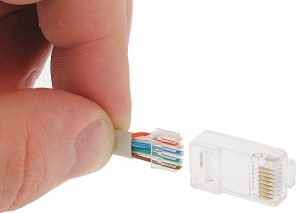
– Let’s untwist all pairs
– Mark the launching order in the connector for the white pairs with a marker
– Straighten the conductors with a cotton round disk. It is important that the conductors should be straight.
– Prepare the ends of the conductors for pulling into the plastic insert by cutting them with a special tool. You can use ordinary side-cutters or sharp scissors, but you must make sure that the cable ends do not form an oval shape, as this will prevent the cable from being pulled through the insert -
Pulling the cable through the plastic insert
– Make sure that the insulation is not damaged or deformed where you cut the conductor– When pulling pairs, first make sure that each cable of the pair individually enters the holes of the insert, then pull both cables simultaneously for paired holes
– After all, wires have passed through the insertion slot, pull the connector insert all the way into the insulation pulling one wire at a time through the insertion slot
– The connector insert fitted should be a maximum of 2 mm from the edge of the outer insulation
– Cut the wires that come out of the edge of the plastic insert– It is not recommended to strip HDPE insulation and pull the conductors through the insert by the copper conductor – this will deform the insulation, and damaged insulation cannot be brought into the insert
– Do not use fine pliers or similar tools to push conductors through the grommet as it can distort the insulation and prevent a damaged conductor from seeping into the grommet– If you have been unable to insert the cable into the insertion slot the first time and damage the sheath, it is best to cut off the damaged part and repeat the operation over the undamaged part
-
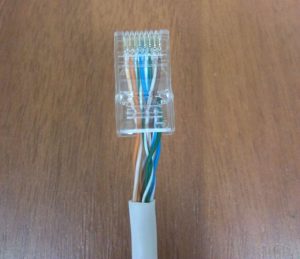
Crimp the connector
– Lead the cable with the prepared insert in the connector
– Be sure that the insertion is pushed into the connector until it stops.
– Use a tool for RJ-45 connectors to crimp the ends.
General Tips to Simplify the Pulling Process
- Insertion tolerances for cat6a connectors are almost absent, which makes higher demands on the accuracy of cable termination
- The cable conductors must be fully straightened; a round cotton pad is handy for this
- Cutting of cable before pulling through the insertion piece should be done with a tool that deforms (crimping) the cable end to a lesser degree because otherwise, the cable could get an oval shape on a cut, which will cause problems when pulling through the insertion piece
- It is possible that the edge of the inlet hole in the plastic insert has micro-scratches or irregularities. To simplify the cabling, the inlet hole can be prepared with a thick needle, awl, or any similar tool. The process takes no more than 20 seconds for one insert but greatly reduces the inconvenience of putting the cable in.
- Since the installation in the category 6a connector is very tight, it is recommended to take around a cotton disc smeared with oil and wipe the ends of the wires being pulled through it – this will simplify the process of pulling the cable through the plastic insert.
It should also be noted that the installation of the connector category 6a on the cable is not common, as a rule at the end of the cable installed module, which has a more convenient type of installation and then to connect the factory patch cord category 6a are used.
Why There May Be No Connection After Crimping
If there is no connection, pay attention to this:
- Are the wires exactly wired according to the diagram? Are they lost? Look through the connector.
- Did the wires reach the wall of the connector? Were the blades able to reach them?
The rest can only be written off as cable breakage. Initially, before crimping the mains cable, you can put these kinds of covers on it. Excellent protection against bending near the connector, but in practice, everything works without them.