How to Install and Configure DNS in Windows Server
Linking addresses to names is just the beginning, because DNS has many more features in addition to host-name-to-address mapping.
See also >> Color Coding Cat 5e and Cat 6 Cable Straight Through and Cross Over
The main features of host name to IP mapping as follows:
Mappings of addresses to names and vice versa ‘known as records’ are stored in a database.
A DNS database also stores additional records.
The DNS database is distributed.
1. Click Start –> Settings –> Control Panel.
2. Double-click Add/Remove Programs and then click Add/Remove Windows Components.
3. In Components, select Networking Services and then click Details.
4. In Subcomponents of Networking Services, select the Domain Name System (DNS) check box, click OK, and then click Next.
5. In Copy Files From, type the full path to the Windows 2000 distribution files and then click OK.
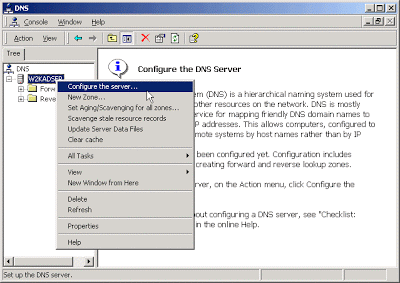
For hosting Active Directory, we have to properly configure DNS with a zone for the Active Directory namespace. You should create both zone types for a proper DNS implementation for your Active Directory namespace — that is, a “forward lookup zone” and a “reverse lookup zone”.
1. Click Start –> Programs –> Administrative Tools –> DNS.
2. Expand the DNS server.
3. Right-click the Forward Lookup Zone folder and choose New Zone.
4. Click Next to continue when the New Zone wizard appears.
5. Ensure that Standard Primary is selected and click Next.
6. Ensure that Forward Lookup Zone is selected and click Next.
7. At the New Zone page, type the name of your zone (for example, geekomad.com) and click Next.
8. Select Create a New File With This File Name and click Next.
9. Click Finish.
1. Click Start –> Programs –> Administrative Tools –> DNS.
2. Expand the DNS server.
3. Right-click your server and choose New Zone.
4. Click Next to continue when the New Zone wizard appears.
5. Ensure that Standard Primary is selected and click Next.
6. Ensure that Reverse Lookup Zone is selected and click Next.
7. Ensure that Network ID is selected, type your network ID in the Network ID field, and click Next.
8. Select Create a New File With This File Name and click Next.
9. Click Finish.
For Active Directory purpose, DNS server is ready. You should now configure the forward and reverse lookup zones for dynamic updating so that you do not get stuck creating all the records required for Active Directory yourself.

